Getting Started with YouTube!
Before You Launch, a few Helpful Tips:
After you sign up for YouTube, you’ll be able to customize your page and have access to several menus.
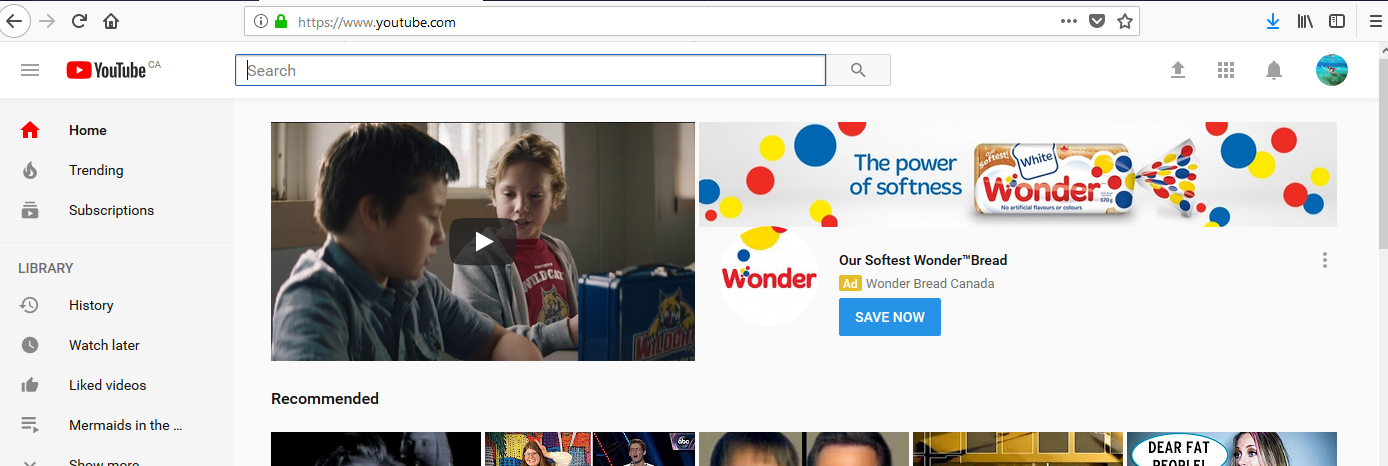
Your main YouTube page will default to an image like this. You will see your icon for your menu at the top right hand corner.

This let’s you see feeds for other videos, along with your watch history, videos you’ve liked, and any playlists you’ve created. Playlisting your own videos is very helpful for organizing them.
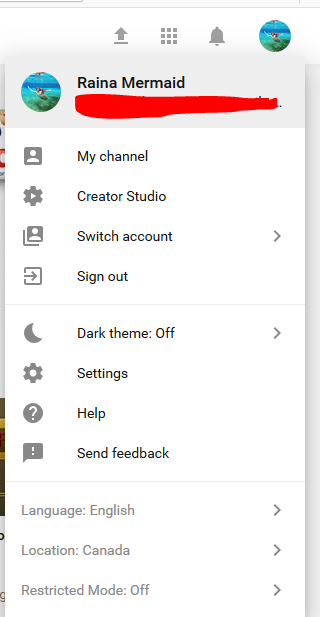
Returning to the top right menu, let’s explore your personal drop down. Click the icon. (you’ll be able to change it if you haven’t already).
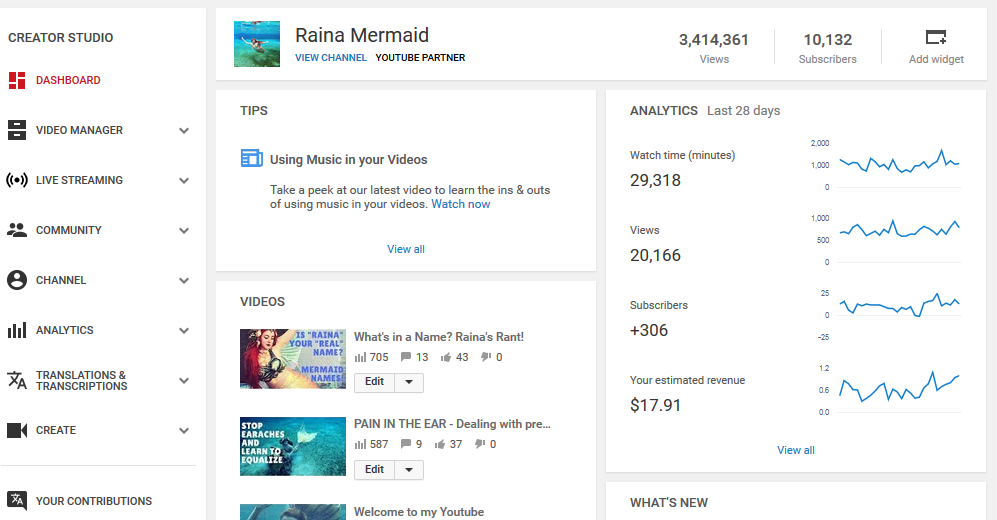
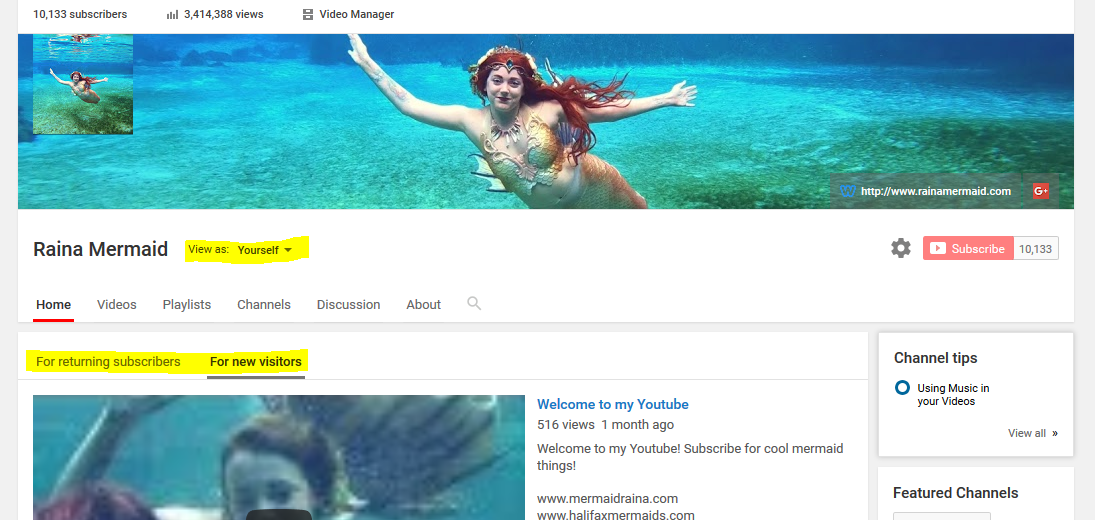
This top bar indicates that I am a “YouTube Partner”. This means I make money from YouTube. I’ll teach you how to do that- don’t worry. You can see my current pageviews and subscribers. There’s also an “add widget” button I can customize. If I want to quickly visit my front page – what viewers see- I can click “view channel”

Down below, you see a snap shot of my analytics.
You can click “view all” to see more details. The “estimated revenue” doesn’t appear to be accurate or to change drastically. However, if you make money from YouTube you’ll get a check or auto-deposit once a month if you’ve reached the $100 threshold of earnings. Looking at these insights will show you which types of videos are the most popular, and which are making you the most money. You can also see a preview of information for your most recent videos, and a tip card that will change daily. 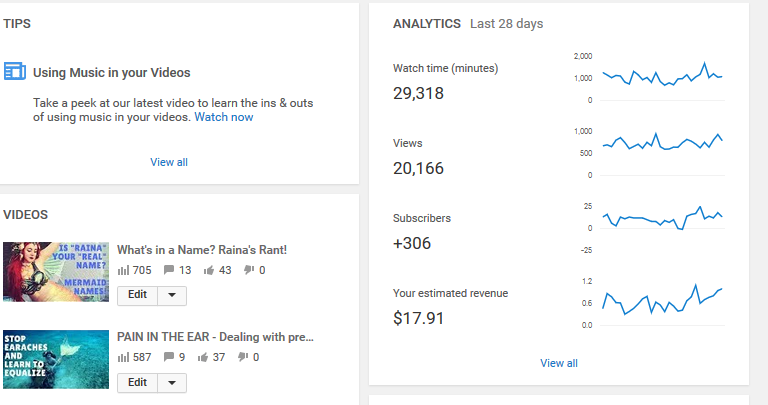
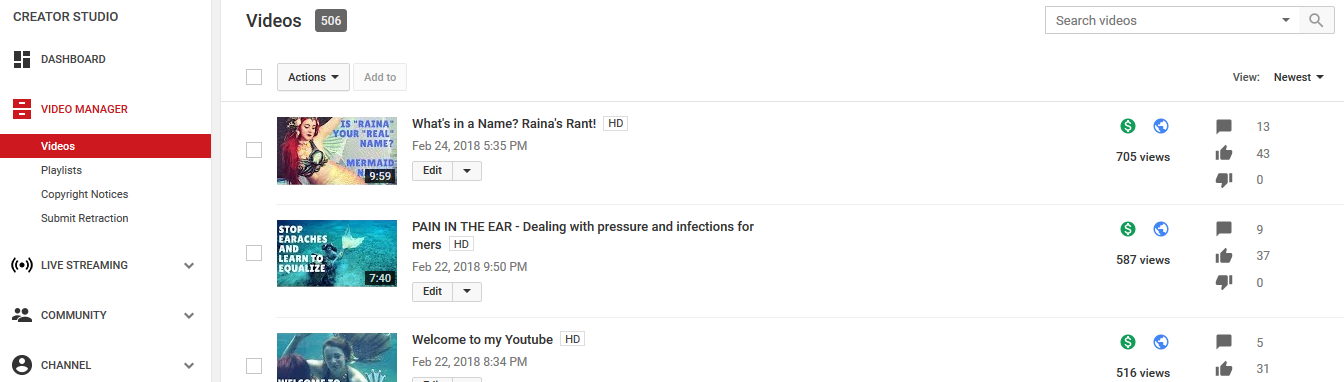
By clicking “video manager” I can see all of my videos. I can see if the video is monetized and making money (green icon), if it can be viewed world wide (earth), how many comments have been approved, and how many likes/dislikes it has received. I also see if the video is in HD.
Along the left-hand side there is a sub menu, I can see playlists, if I’ve gotten any copyright notices, and retractions for dealing with disputes. Using the “actions” button and the selection boxes next to each video I get a number of actions I can apply, such as making the video private, unlisted, deleting, changing tags, etc. Once I have uploaded a video, this is where I go to make any changes or set the settings. Once I click on “edit” this is what you will see: 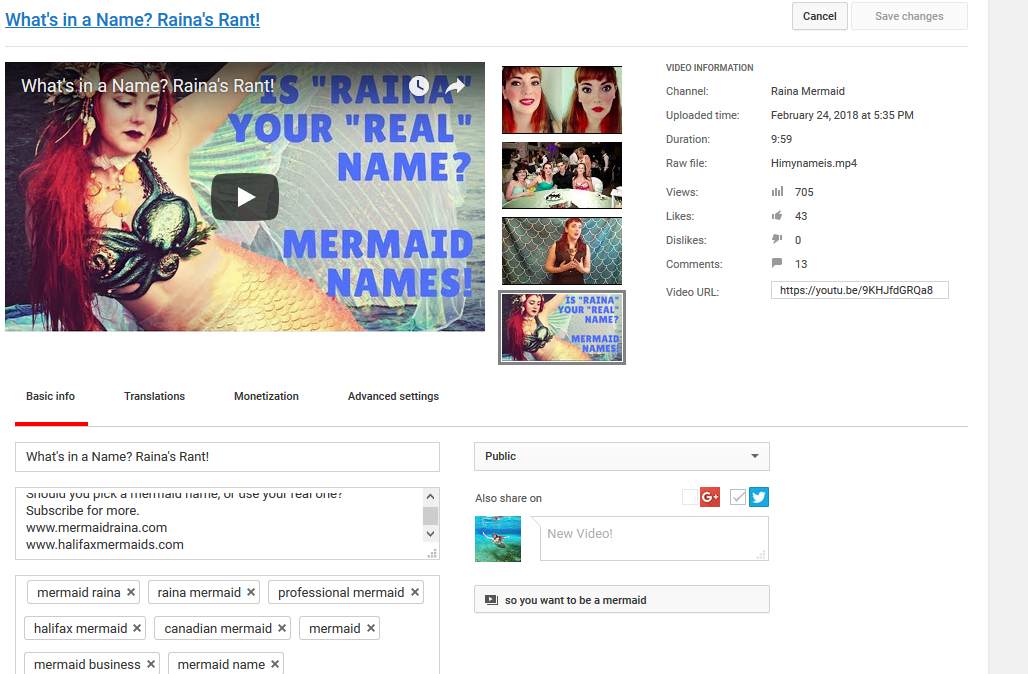
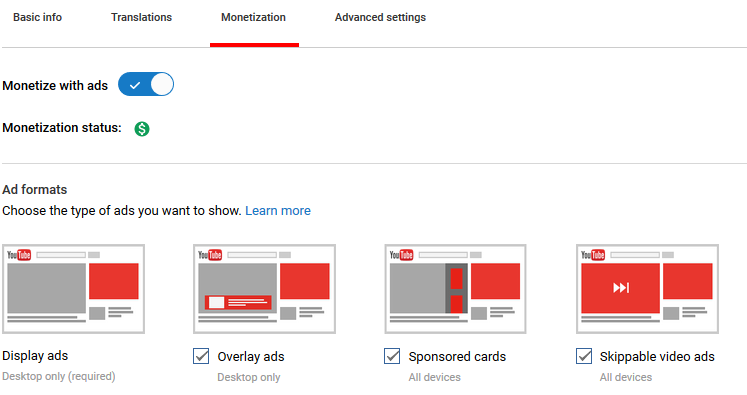
In this menu I can change the tags, apply translations, apply to monetize my video, share it on social media, select a new thumbnail and more. If someone else helped me with the video on YouTube, there is even a button for giving that user credit. Under the monetization tab you can select the way you want ads to appear once you're a partner, see the status, and toggle on or off. Note: YouTube will sometimes inappropriately tag something as not being advertiser friendly. If this happens to you, no worries. I’ll show you how to fix it.
Under “Advanced Settings” you can select how to moderate comments. I suggest what I have selected here. This means you’ll have to approve every comment. Or you can turn them off all together. You can see there are many other options you can change as well.
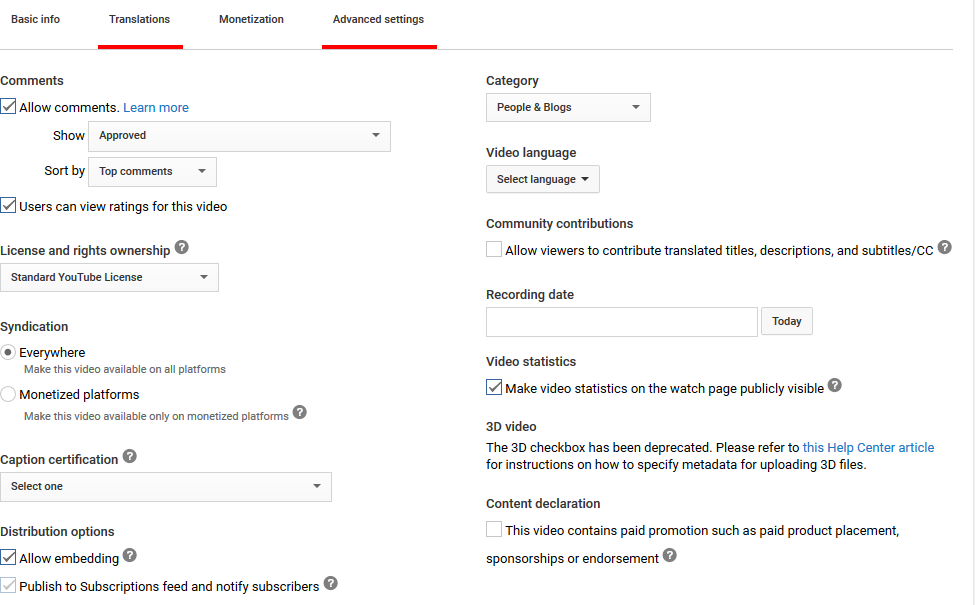
At the top of the screen are other tabs for edits you can make to your video. You can easily change/replace music, make minor edits, and add annotations. “Enhancements” will allow you to do some very minor edits.

Now let’s continue and look at how to moderate comments. On the left hand drop down menu, you’re going to want to click “comments”. This will bring you to a new window: 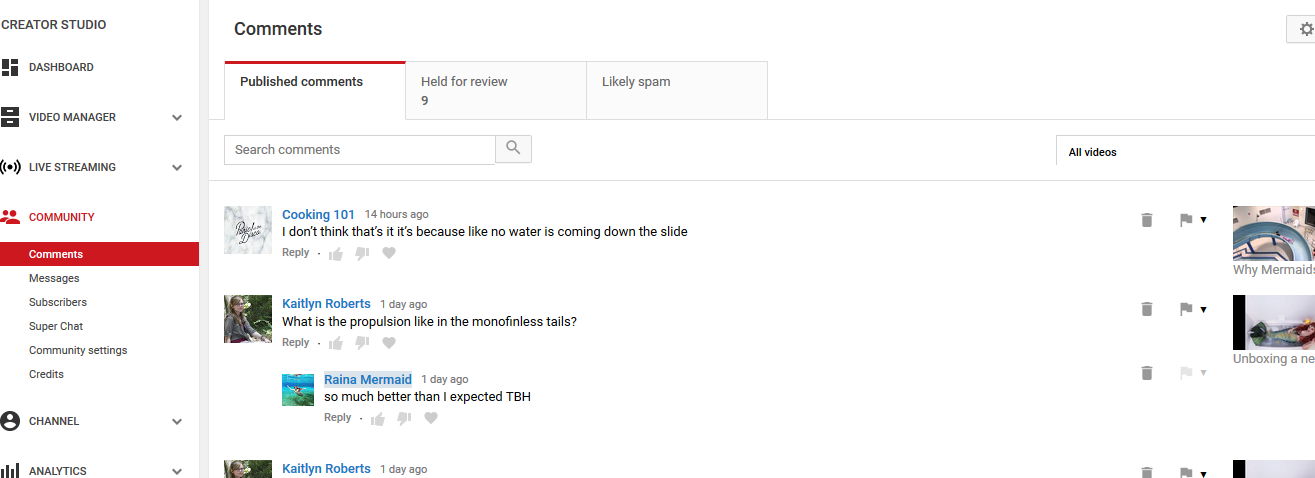
In this window I can see approved comments, comments awaiting moderation, and spam. I see exactly what video they’re attached to. If I approve a comment from the review tab, it moves to this published comments tab. From here I can heart it, vote on it, and reply to it. I can also flag it for abuse or spam (which can also be done on the other tabs) or go ahead and delete it. On this same menu, you can access messages- but most YouTubers do not use this, so don’t worry. The “create” menu button on the left, takes you to the free music library. 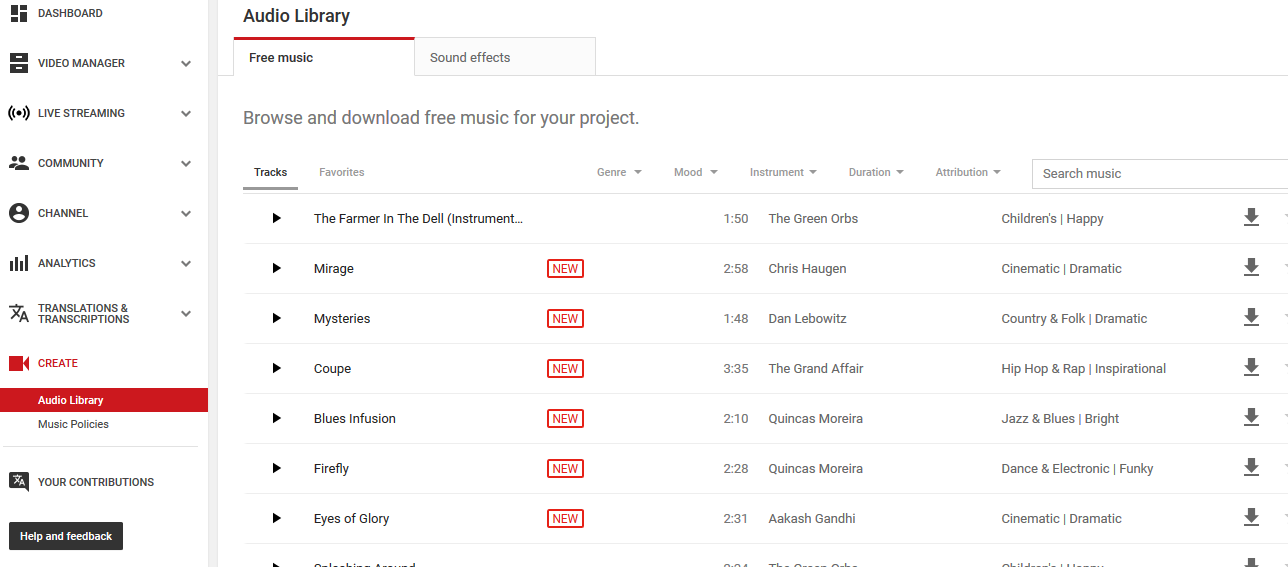
You can preview these audio files, download them, and use them in your videos. You can also get sound effects. At the top of the page there is usually a blue bar where you can search copyrighted music to see if you can use it. You won’t be able to make money from copyrighted music, but sometimes you’re still allowed to at least use it.

Click the link. You’ll be able to see current pop music along with searching it. Click on the song to see the details:
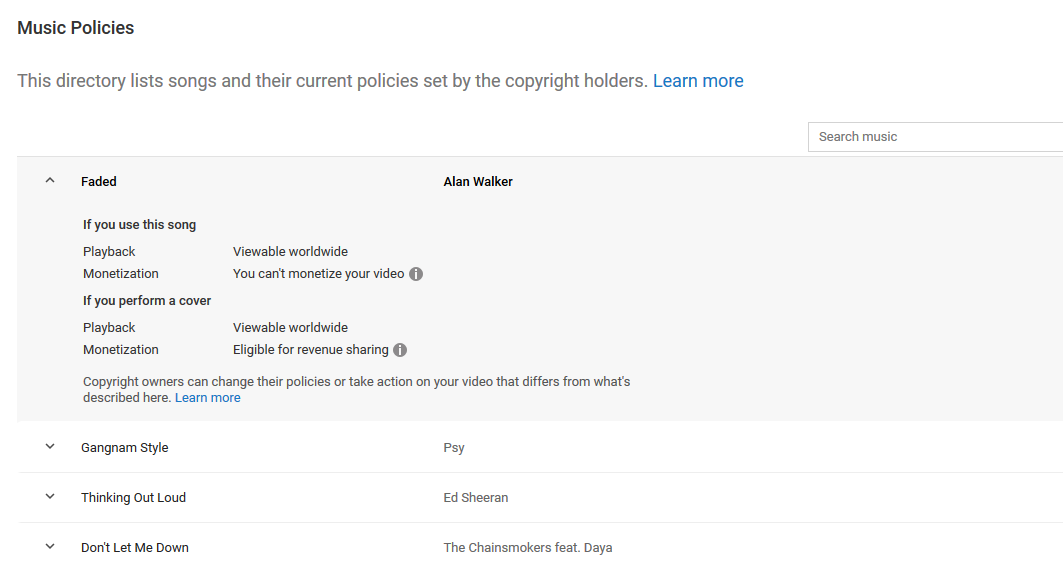
In this instance, I can use the song on the video, but I won’t be able to make money off it. (unless I record a cover song). I can see that if I use this song people around the world will still be able to watch the video. (this isn’t always the case).
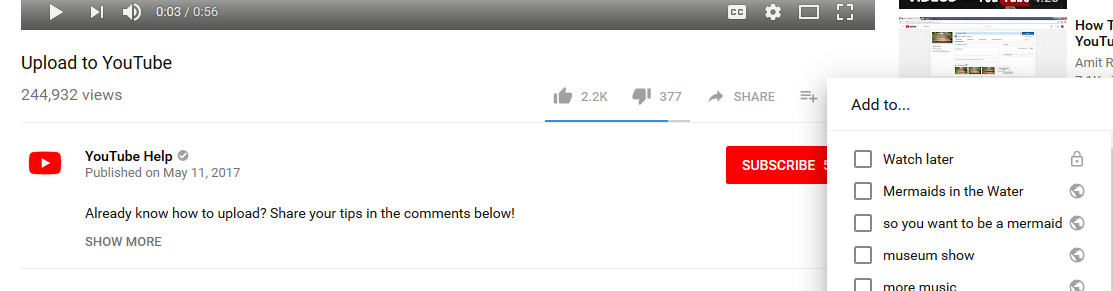
Uploading a Video to YouTube: You can upload a video to YouTube from anytime on your desktop or the ap by clicking the upload arrow we’ve already seen in the top right-hand corner. Once you click, you’ll see this window. 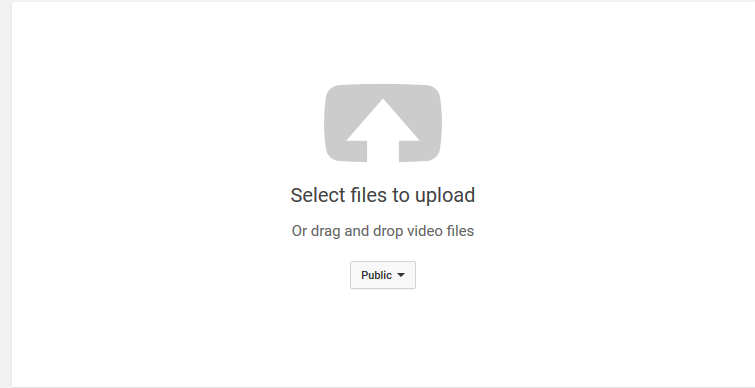
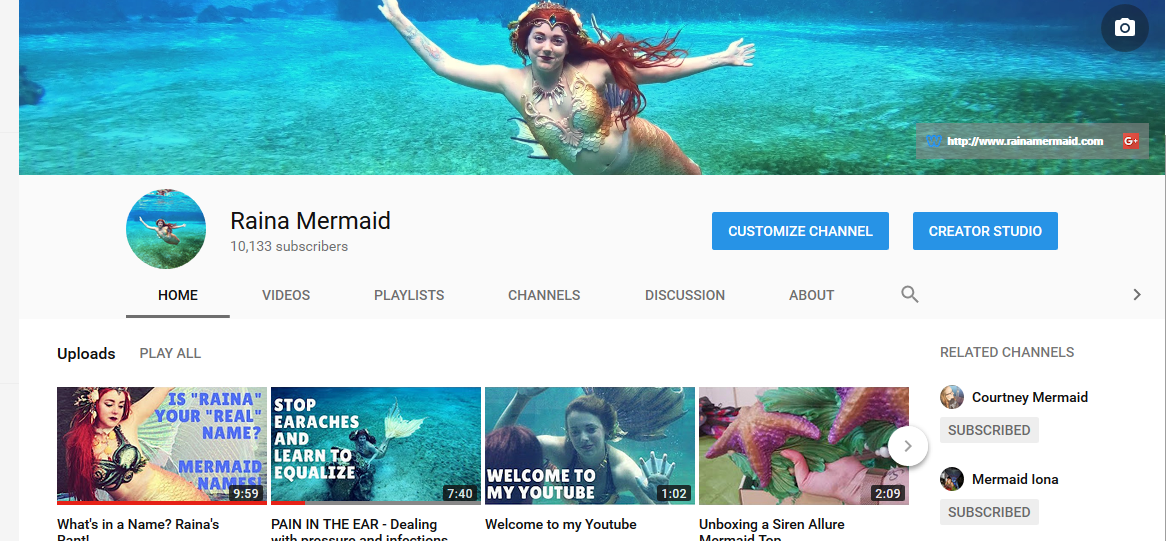
On your “my channel” front page, you’ll be able to customize the same way you do on Facebook with a profile and cover picture. You can add a link to your website, and by clicking the “customize” button you can choose which playlists you’d like viewers to see when they visit your page. You can also select a specific video to auto-play with returning viewers visit, and one for when new visitors visit. A lot of people make a “welcome to my YouTube’ video for this purpose.
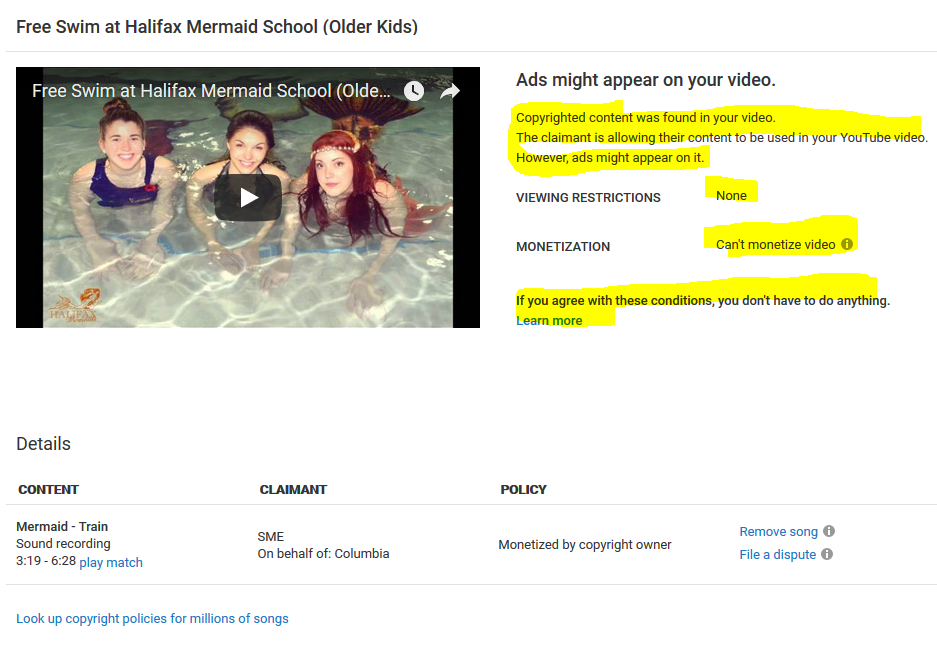
If you get a copyright notice on a video, don’t panic. It doesn’t mean you’re in trouble. Most times YouTube will not take your video down, but they will send you a message that you have to agree with. It’ll notify you that you won’t be able to make money off the clip, and any other limitations. Of course, if they do ask you to remove the clip, you must do that. If this was done in error, you can also dispute the claim. As you see I have a copyright claim on this video for music use.

By clicking the hyperlink I am taken to this screen where I can see the limitations, or dispute it if need be:
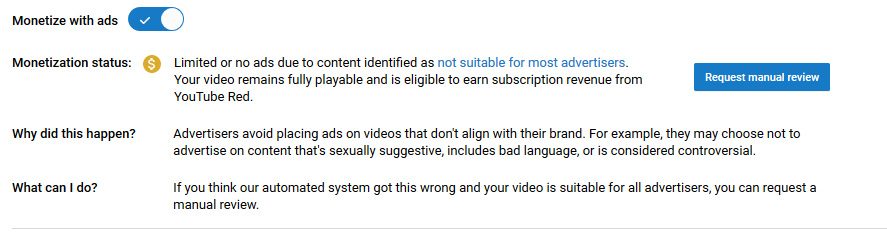
Sometimes you will run into an issue where your video is accidentally flagged for having “content that isn’t advertiser friendly”. If this is the case, your dollar sign will turn yellow:

Click the "request review" button
How to Apply to Make Money on YouTube To make that money, you’ll need to meet a few standards:
Setting up your channel: (As quoted directly from YouTube)
When you set this up, you will start earning money as soon as your channel is approved.
Once your channel meets the program threshold, we'll review your application to make sure your channel activity adheres to the YouTube Partner Program policies, YouTube Terms of Service, and our Community Guidelines. We'll let you know as soon as the process is complete. If you don't have enough views for a review yet, keep making original content and growing your audience. This view count threshold gives us enough information to determine the validity of a channel. It also allows us to confirm if a channel is following our community guidelines and advertiser policies.
1 Comment
Steve
4/7/2018 12:37:15 pm
Could you please do a YouTube video based on this, to help understand best tips are Your comment will be posted after it is approved.
Leave a Reply. |

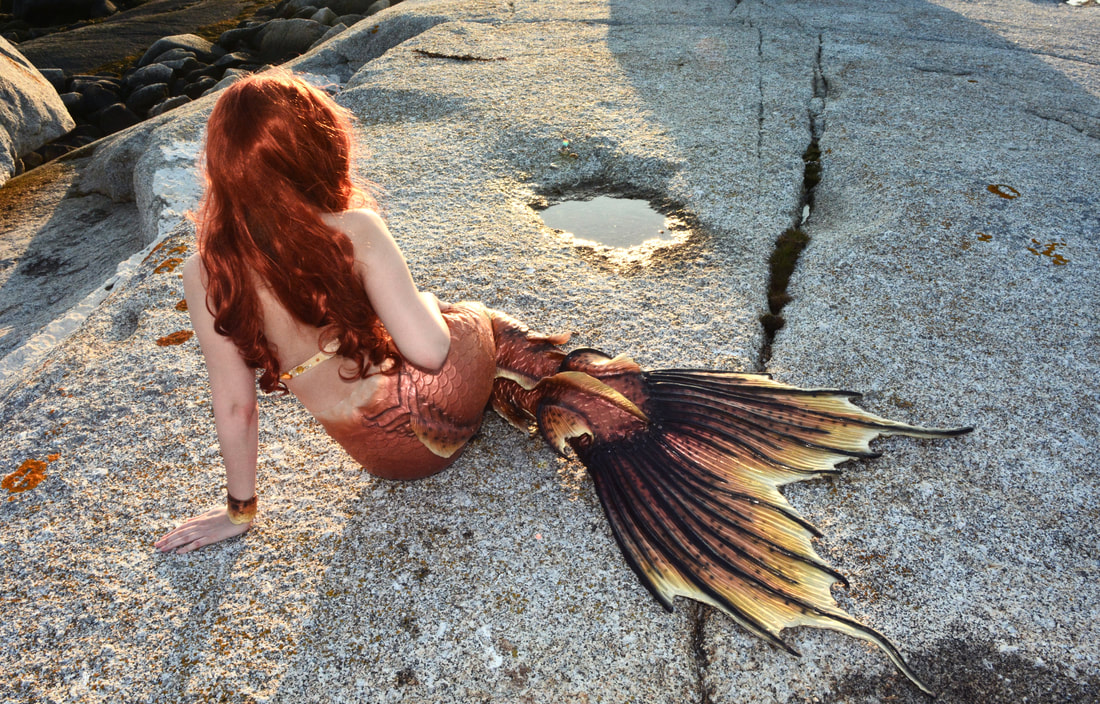
RainaThe Halifax Mermaid 
Buy the BookLeave a Tip
Disclaimer:
The information in these blogs and video posts are for informational purposes only. Trying any of these suggestions are done so at your own risk. The creator/owner assumes no risk or liability and urges you to seek out professional training and advice.


Archives
August 2018
|


 RSS Feed
